In this tutorial you will learn how to create awesome designer social networking icons of a dragon, wolf, horse and tiger in Corel Draw.

Final Image Preview
Tutorial Details
- Program: CorelDraw 11 - X5
- Difficulty: All
- Estimated Completion Time: 30 Minutes
Step 1 : Basic Elements
First of all you have to use CorelDraw with version 11+. In this tutorial I use CorelDraw X5, Okay lets get started. Let’s take a look at the basic elements used to create our design :
This also will be our steps to create the design.
Step 2 : Creating Worksheet
Okay, now that you know the steps and elements, we will begin, first of all open your CorelDraw program, now create a new file and set the paper size to A4.
Step 3 : Creating the Icon Body
Now that we have our worksheet set, we will begin to create the Icon Body, first go to the " Ellipse Tool ", you can find it on the left toolbar, make a Circle shape.
After that create another Circle shape and make it smaller than the original.
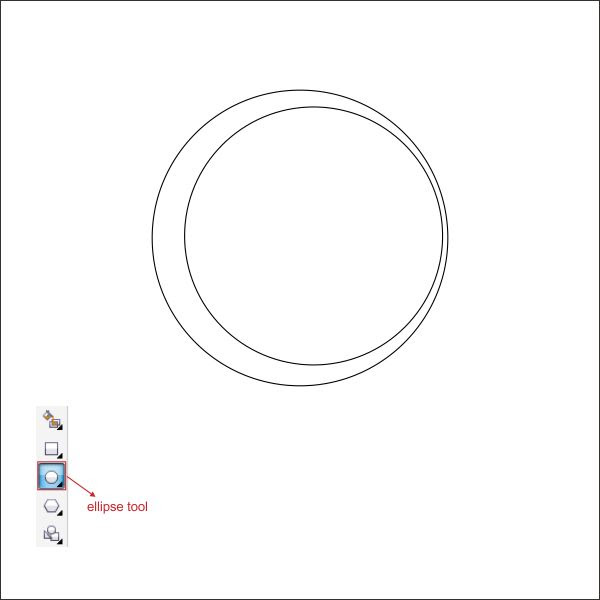
Create another copy of Circle shape and make it smaller than the original.

Lets put color on the Biggest circle, by going to the " Fountain Fill tool " in the left toolbar and apply the value below.


Now select the second Circle shape and put color in it by going to the " Fountain Fill tool " in the left toolbar and apply the value below.


After that select the last Circle and put color in it by going to the " Fountain Fill tool " in the left toolbar and apply the value below.


Step 4 : Working With Transparency
We are going to make a glass effect into the Icon Body, go to the " Ellipse Tool " and create an ellipse shape.
After that put white color in it and arrange the ellipse shape on top of the Icon Body.

Now go to the " Interactive Transparency Tool " in the left toolbar, now you see that the cursor are turning into a black glass hold and drag from right top corner to the middle to create a transparency effect.

Step 5 : Working With Bezier and Shape Tool
In this tutorial we are going to use " Bezier & Shape Tool " a lot because we need to draw each elements with it, go to the " Bezier Tool " in the left toolbar and draw a custom shape like below, make sure that the last click is connected with the first click or else you cant put color in it.
Now go to the " Shape Tool " in the left toolbar, double left click on the left middle line to create custom corner, after that drag it to the middle similar like below.

Now using the same steps as above, shape it similar like below.

After that right click on one of the middle lines, and find " Convert to Curves " in the top toolbar.

Now you will see that there is an arrow in the corner, hold and drag it in order to shape.

Using same steps as above shape it similar like below.

Double click and drag to create custom corner.
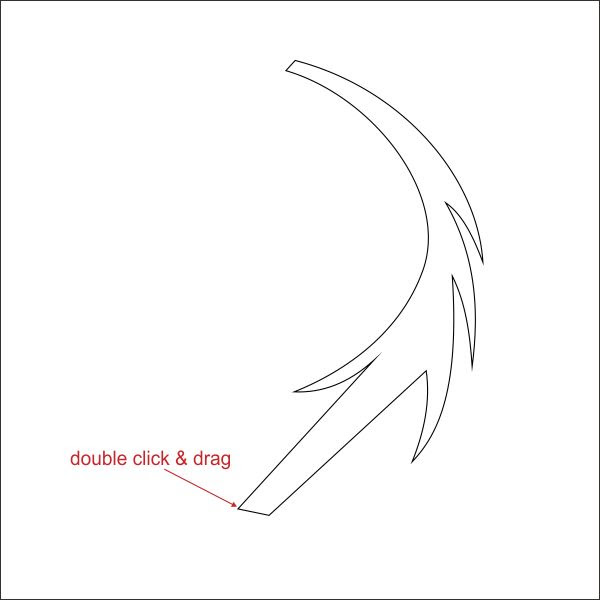
Shape it similar like below.
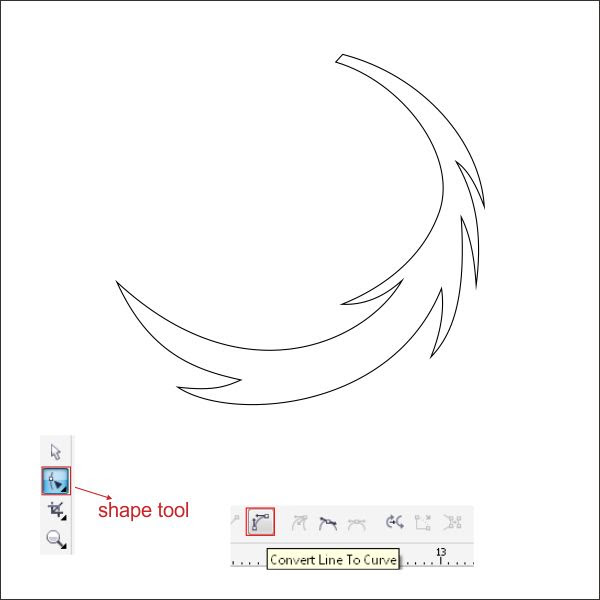
Now put color in it by going to the " Fountain Fill tool " in the left toolbar and apply the value below.


Using " Bezier Tool " create a custom triangle shape from the top to the middle of the shape.

Shape it using " Shape Tool " use your feeling and make the curve same as the custom shape.

Put pale yellow color in it.
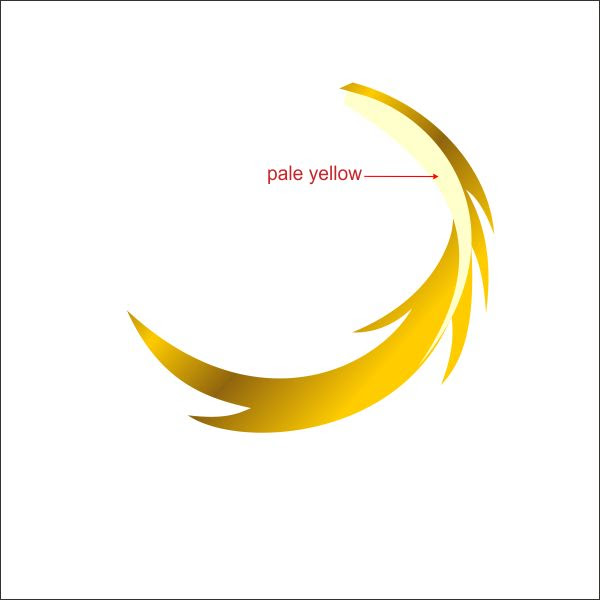
Make it transparent using the same ways as step 4.

Now copy the transparent shape and arrange it on the bottom curver.
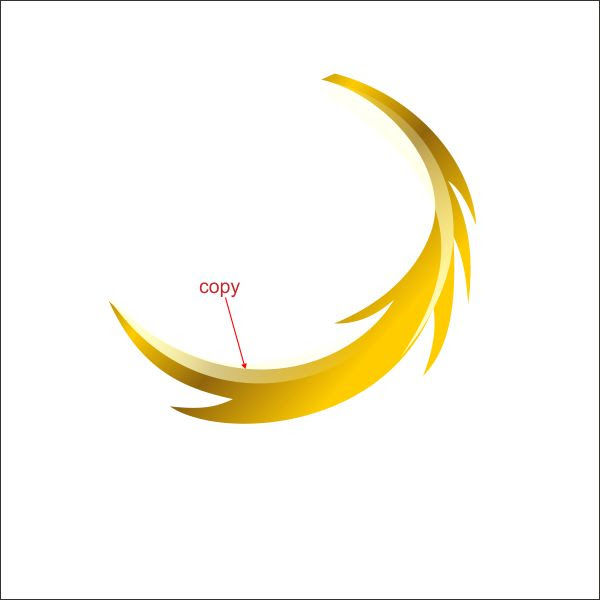
Select all of the object and group it by pressing " Ctrl + G ", after that arrange it on the bottom of the Icon Body.

Step 6 : Creating The Dragon
Now you already know how to work with " Bezier and Shape Tool ", create a custom shape like in picture below.
Shape it using " Shape Tool ", make sure you change all the lines into curves.
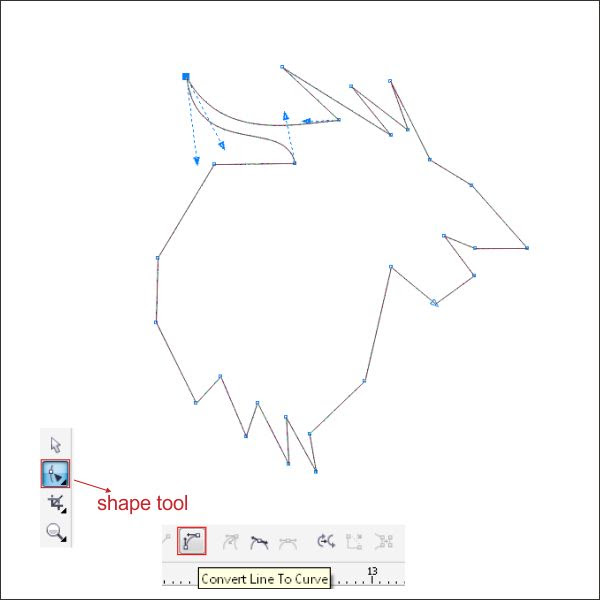
Use your feeling and shape it similar like below.

Double click and drag the bottom corner to create custom corner.

Shape it similar like below.

Now we are going to add a claw in the Dragon shape, go to the " Bezier Tool " and create a custom shape.

Shape it using " Shape Tool ", make sure to conver all the lines to curves.

Arrange the Claw shape on the right middle of the Dragon, and select both of the object, after that go to the upper toolbar and find " Weld Tool ", press it in order to combine both objects.


Afterr that we are going to make a tribal texture into the Dragon, go to the " Bezier Tool " and create custom shape similar like below.

Shape it using " Shape Tool ".

Arrange the custom shape that you previously create on top of the Dragon head.

Select the Dragon shape and put color in it by go to the " Fountain Fill Tool " and apply the value below.

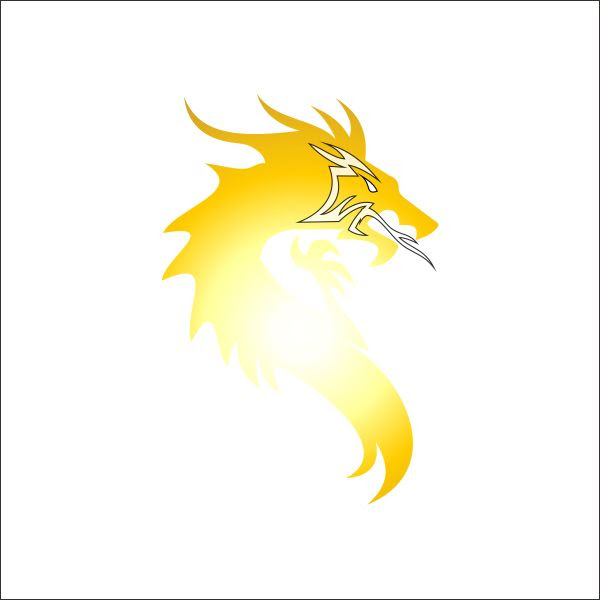
Select the tribal texture and put dark gold color in it.
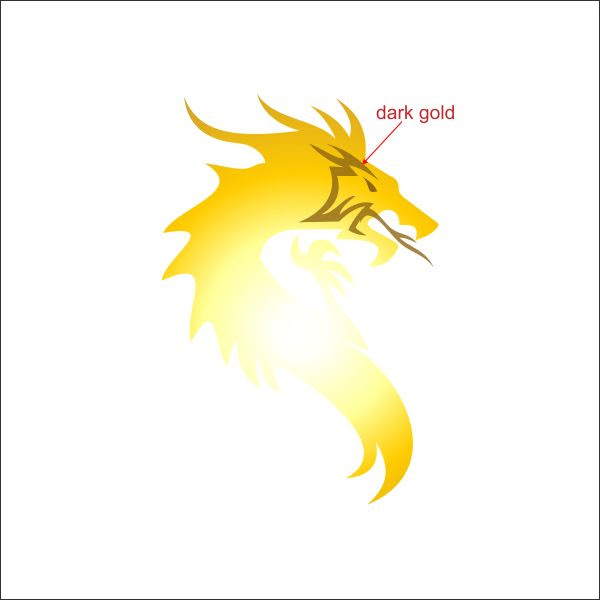
We are going to add more texture on the Dragon body, go to the " Bezier Tool " and create custom shape similar like below.

Shape it using " Shape Tool ".
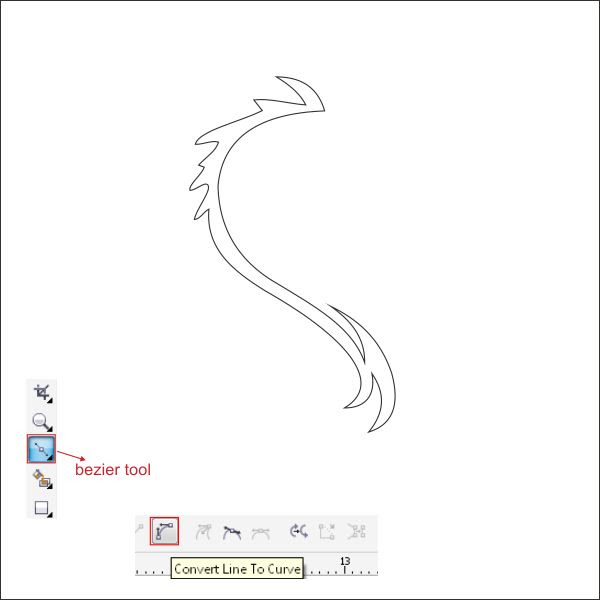
Put color in it by go to the " Fountain Fill Tool " and apply the value below.

Arrange it on top of the Dragon body.

Select all of the objects and group it by pressing " Ctrl + G ", after that arrange it on top of the Icon body.

Step 7 : Creating the Wolf
Now you already know how to work with " Bezier and Shape Tool ", create a custom shape like in picture below.
Shape it using " Shape Tool ".
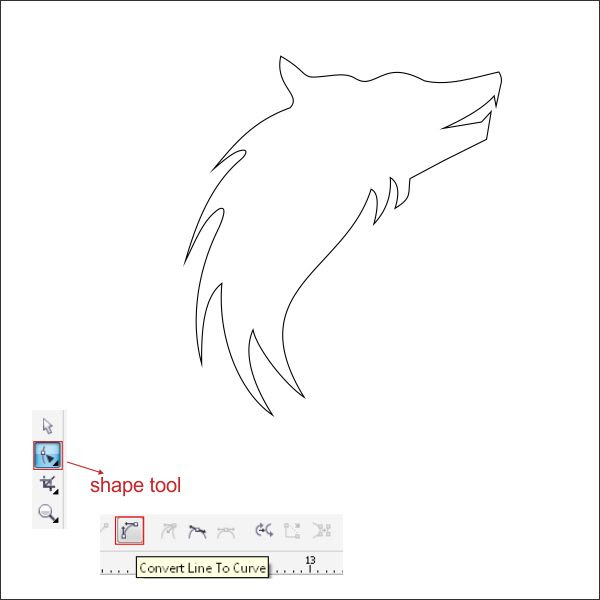
Put color in it by go to the " Fountain Fill Tool " in the left toolbar and apply the value below.


We are going to add an ear texture to the wolf shape, go to the " Bezier Tool " and create a ears like shape on the Wolf head.

Shape it using " Shape Tool ".

Put dark gold color in the ear shape.

We are going to add texture on the wolf body, go to the " Bezier Tool " and create custom shape like below, use your feeling and follow the flow of the wolf body.

Shape it using " Shape Tool ".

Put color in it by go to the " Fountain Fill Tool " and apply the value below.


Using same steps as above add an eye to the Wolf head, after that group all of the objects by selecting all of them and press " Ctrl + G ", arrange it on top of the Icon Body.

Step 8 : Creating the Horse
Now you already know how to work with " Bezier and Shape Tool ", create a custom shape like in picture below.
Shape it using " Shape Tool ".

Put color in it by go to the " Fountain Fill Tool " and apply the value below.


Copy the horse shape and put it on top of the original, make sure it smaller than the original.

Select the copied horse shape and put color in it by go to the " Fountain Fill Tool " and apply the value below.


We are going to add some hair into the horse shape, go to the " Bezier Tool " and create custom shape similar like below.

Shape it using " Shape Tool "

Put color in it by go to the " Fountain Fill Tool " and apply the value below.


Arrange it on the Left side of the Horse shape.

Select all of the object and group it by pressing " Ctrl + G ", after that arrange it on top of the Icon Body.

Step 9 : Creating the Tiger
Now you already know how to work with " Bezier and Shape Tool ", create a custom shape like in picture below.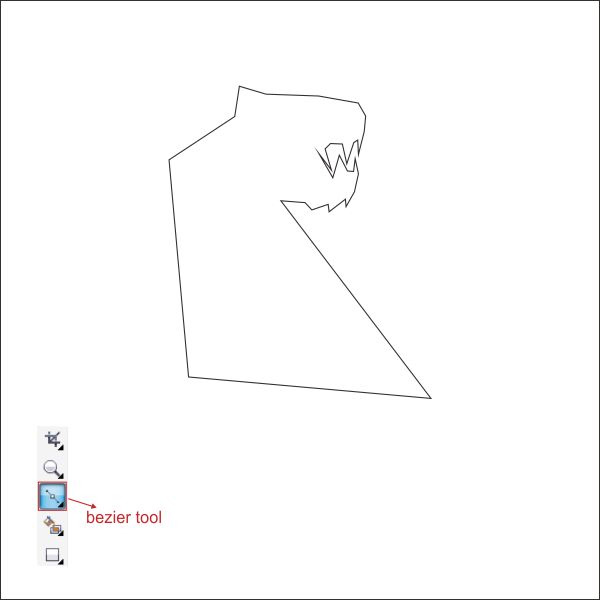
Shape it using " Shape Tool ".


Put color in it by go to the " Fountain Fill Tool " and apply the value below.


Now we are going to add a tribal texture on the Tiger, create a custom shape using " Bezier Tool " similar like below, i know its a little bit confusing, but use your feeling and you will get used to it.

Shape it using " Shape Tool ".

Put color in it by go to the " Fountain Fill Tool " and apply the value below.

Arrange it on top of the Tiger shape.

Select all of the object and group it by pressing " Ctrl + G ", after that arrange it on top of the Icon Body.


0 komentar:
Posting Komentar