Drawing an Anime Cartoon in Corel Draw
In this tutorial you will learn how to draw an anime cartoon character in Corel Draw. Learn how to master the basic Bezier and Shape tool of coreldraw to create a cool anime character. You can also download the free source file at the end of the tutorial.
Tutorial Details
- Program: CorelDraw 11 - X5
- Difficulty: All
- Estimated Completion Time: 1 Hour
Step 1 : Basic Elements
First of all you have to use CorelDraw with version 11+. In this tutorial I use CorelDraw X5, Okay lets get started. Let’s take a look at the basic elements used to create our design :Step 2 : Creating Worksheet
Okay, now that you know the steps and elements, we will begin, first of all open your CorelDraw program, now create a new file and set the paper size to A4.
Step 3 : Creating The Head
Now that we have our worksheet set, now we will begin to create the Anime Head, go to the " Bezier Tool " in the left toolbar and create a custom shape similar like below.Point and click to create the shape, make sure the last click is connected to the first click or else you cant put color in it.
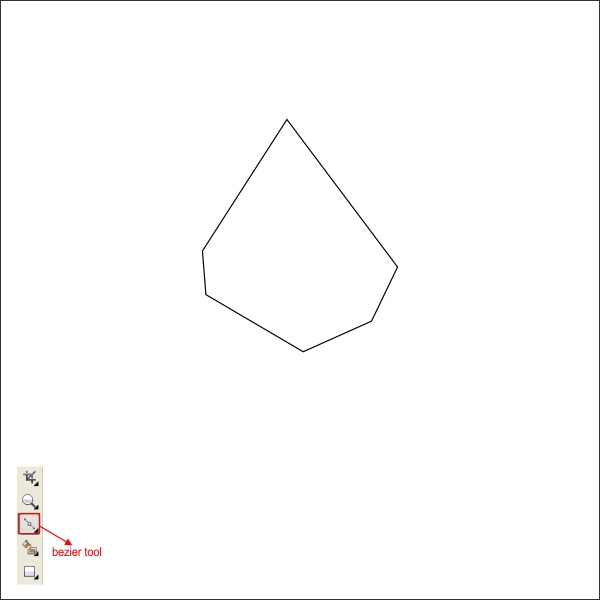
Now go to the " Shape tool " in the left toolbar, click on middle lines between the corners and find " Convert to curve " in the upper toolbar.
Click and drag in order to shape it similar like below.

Using same steps as above apply it to all the lines, untill it shaped like a head.

Okay now go to the color pallette in the right toolbar and put " Sand " color, this will be our basic skin color for the anime.

Step 4 : Creating The Face
Now that we have our Anime Head ready, lets begin to create the Face, first we will start to create an Eyes.Go to the " Bezier Tool " and create a custom triangle shape similar like below.

After that shape it using " Shape Tool ", shape it untill it looks like an base cartoon eye.

Now create another custom triangle shape with " Bezier Tool " on top of the base eye similar like below.

Shape it using " Shape Tool " untill it looks like an eyeliner.

Using same steps as above create another custom triangle shape to create an eyelash.
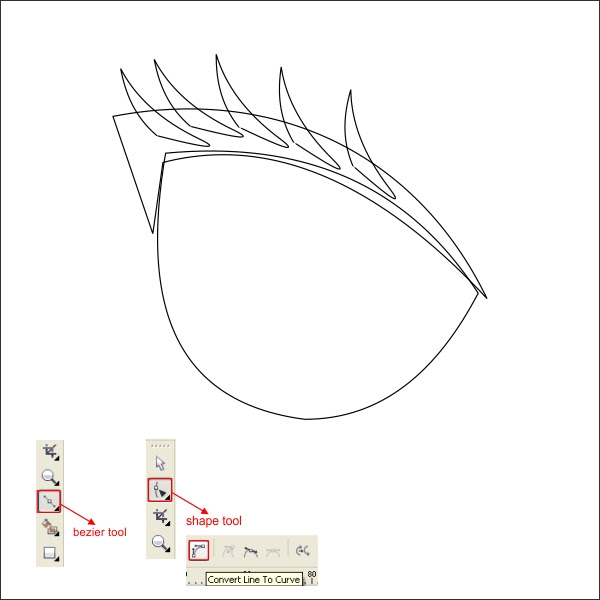
After that create another custom triangle shape to create the eyebrow.

Now put Black color for the Eyeliner, eyelash, and eyebrow, and white for the eye base.

Okay now go to the " Ellipse Tool " in the left toolbar and drag to create a custom circle shape similar like below to create the Retina.

After that we are going to create the eye Lens, go to the " Bezier Tool " and create a custom shape similar like below.
You can put any color that you like for the Lens, in this case i use pink.

Make the corner rounded using " Shape Tool " so it looks more like an eye lens.
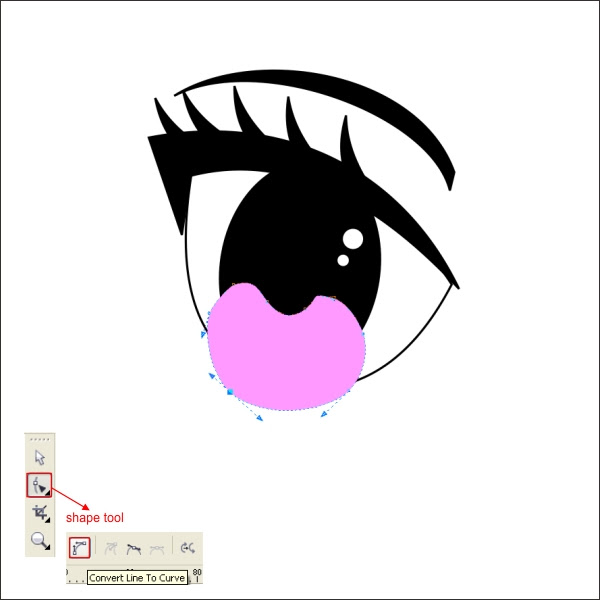
After that go to the " Interactive Transparency Tool " in the left toolbar, drag it from bottom to top to create a linear transparency.

Now we are going to insert the Lens into the Retine using " PowerClip ".
Select the lens and go to the upper toolbar find " Effect > PowerClip > Place inside Container ", click it to the Retina.


Now group it by pressing " Ctrl + G " and arrange it on top of the Head, after that flip and copy the eyes, by pressing " Left + Right " mouse while dragging it to the right.

Okay now create a nose by simply creating a line and shape it using " Bezier & Shape Tool " similar like below.

Using same steps as above now create the mouth for the anime characters and put a dark red color in it.

Okay now we are going to create the detail for the mouth which is adding a tongue and a teeth.
Go to the " Ellipse Tool " and create a custom circle, put pink color in it, after that create another but put white color in it.

Put the tongue and teeth inside the mouth using " PowerClip " similar as previous steps above.

Step 5 : Creating The Hair
Now that we have our Anime Head & Face ready, lets begin to create the Hair.Go to the " Bezier Tool " and create a random custom shape similar like below, keep in mind that the trick is to make a random shape around the head.

After that you can shape it using " Shape Tool " untill it shaped like a hair.
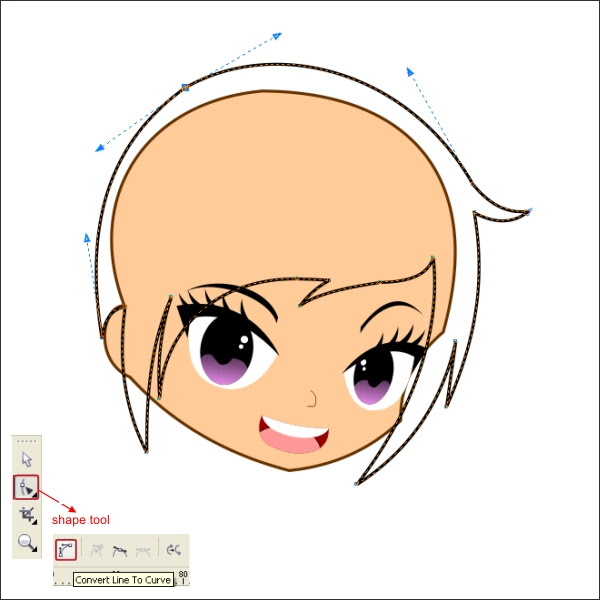
Put any color that you like on the hair, in this case i use Dark Purple.

Now copy the hair and put a Dark Red Brown color in it, this will be our basic skin highlight color.
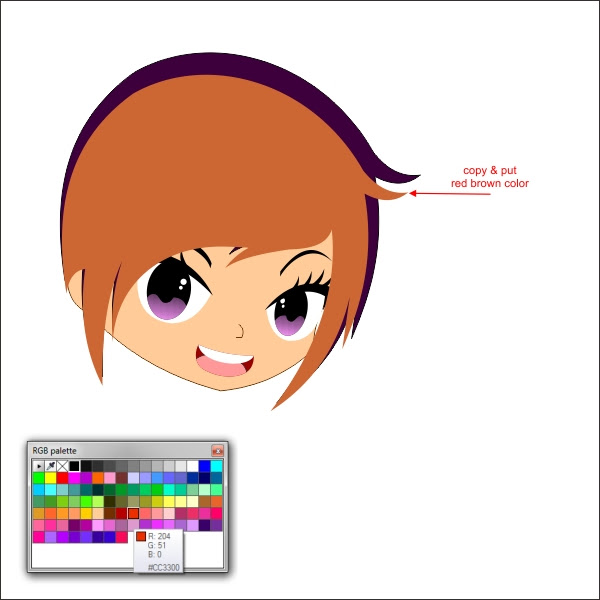
After that send the copied hair into botton layer by pressing " Ctrl + PageDown ".
Now create a custom box shape into the face and put same color as our base highlight skin color.

Shape the custom box, make it the same flow texture as the Face.

After that select the custom shape, and the copied hair, go to the " Interactive Transparency Tool " and apply the value below.
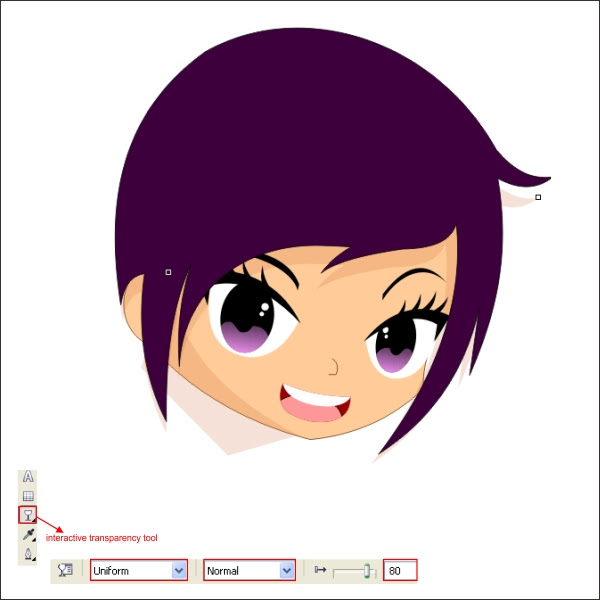
Insert the Face texture and the copied Hair inside the Face using " PowerClip" Tool.


Now that you have already know how to work with " Bezier " and " Shape " tool, create a Highlight for the Hair using " Bezier " and " Shape " tool, The trick is follow the contour of the Hair.

Put a color in the Hair Highlight use any color that lighter than the original hair, in this case i use purple.
After that Insert the Hair Highlight inside the Hair using " PowerClip " .


Okay now lets create a pony tail for the Anime, create a custom shape using " Bezier Tool " and shape it using " Shape Tool " similar like below.

Using the same technique to create the Hair Highlight, copy and put a lighter color on the Pony Tail.

After that flip & copy the pony tail by pressing " Left + Right " mouse while dragging it to the right.

You can create a ribbon to the hair to add more detail similar like below ( optional ).

Step 6 : Creating the Body & Hands
Okay now that we have the Head & Face ready lets begin to create the Body, go to the " Bezier Tool " to create a custom shape on the bottom of the head.
Using " Shape Tool " shape it until it looks like a girls body.

Create a neck for the body and put a skin color in it.

Arrange the body into the bottom layer by pressing " Ctrl + PageDown ".

After that we are going to create a shirt for the Anime, go to the " Bezier " tool and create a shape similar like below, the trick is to follow the contour of the Body.

Copy the custom shape at put light gray color to create a shadow for the shirt.

Create another custom shape to the right side of the body.

Add another detail by adding button to the shirt using " Ellipse Tool ".

Now select all the shirt shape and insert it to the Body using " PowerClip " tool.


After that create a Belt for the Anime using " Bezier " and " Shape " tool.

Using same technique as above, create an arm for the Anime using " Bezier & Shape Tool ".

Put base skin color to the Arm.
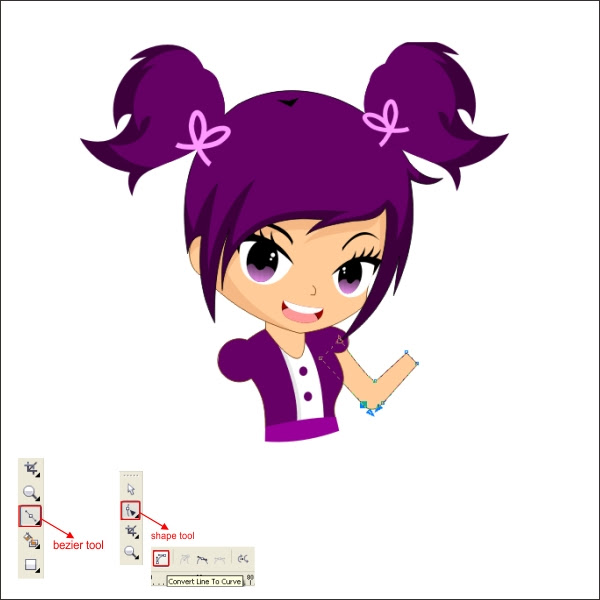
Next step is create a hands for the Arm, by using " Bezier & Shape Tool " similar like below.

Shape it using " Shape Tool " and put a base skin color in it.
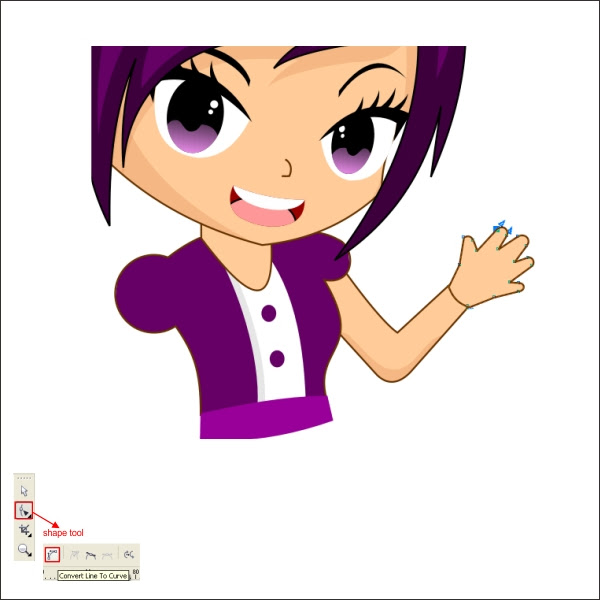
Using the same technique as above, create a second Arm for the character.
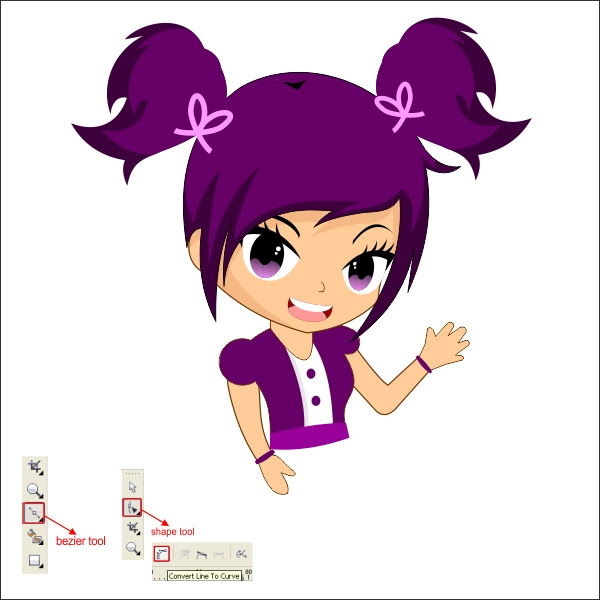
Step 7 : Creating The Torso & Legs
Now our Anime is almost ready, we just have to add a torso and legs in it.Go to the " Bezier Tool " and create a random custom box shape similar like below to create a skirt.

Using same steps as above create a legs and a shoes for the Anime similar like below.


After that copy the Legs to create both legs similar like below.

Cool, now we are going to add some highlights to the Body and Legs, draw a custom shape using " Bezier Tool " and put a dark color in it similar as below.
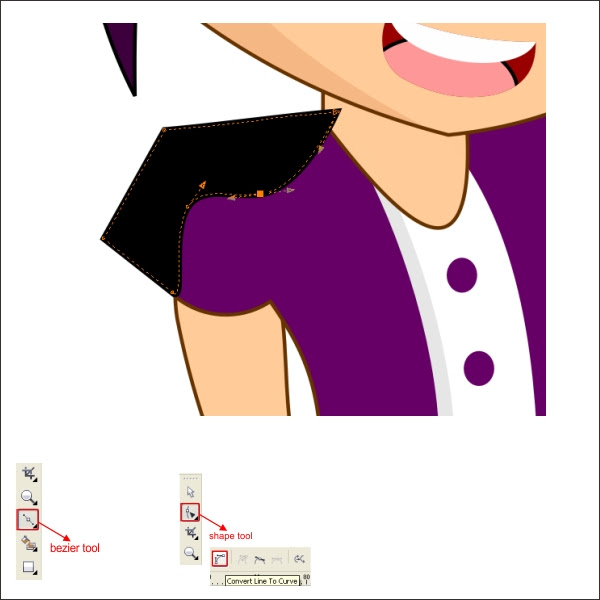
Now go to the " Interactive Transparency " tool and apply the value below to make the Highlights thinner.
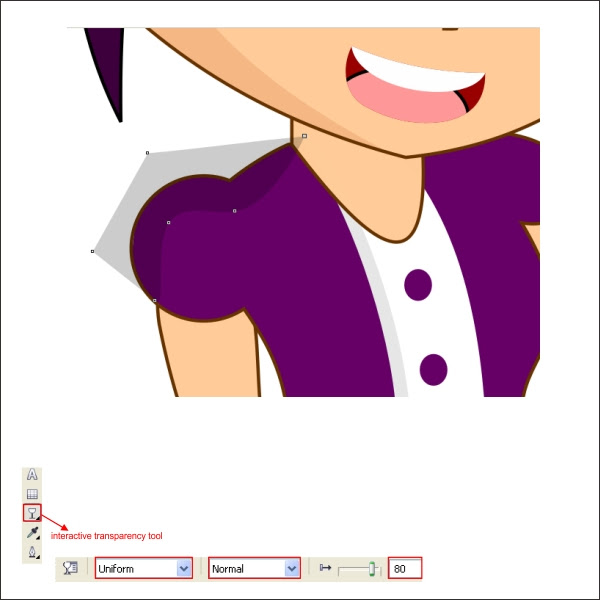
Apply the same steps as above to all the body and legs.

Final Image
And we are done, by using the same technique as above you can add more details to the Anime or create another similar cartoon characters like the final image below.


0 komentar:
Posting Komentar